Step Nineteen: How To Replace your Pacman Monitor.
If you are here then you have ordered a brand new monitor and You are ready to install it in your original Pacman or Ms Pacman machine.
First please note that most arcade monitors can be fixed just by repairing the chassis; however, there are some instances where you need to replace the monitor in your arcade game entirely as it is a whole lot simplier. Cracked neck and screen burn are just some of the reasons that might lead you to consider this option. While doing this is more tedious than just removing and installing the chassis, it can be accomplished with just a few simple steps. Please review the Manual before beginning:
Caution High Voltage!!! Please unplug both the game and the Monitor before beginning! Monitors hold an extremely high amount of voltage which can be very dangerous to you should you come in contact with it. Unplug the game and Unplug Your Monitor Also:
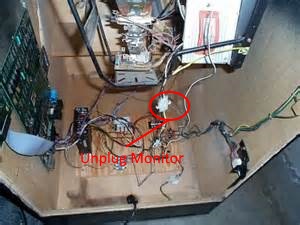
With the power wires disconnected, look for the video wires coming from the board. If you examine your wiring harness coming from your board connector, you should see a set of about 5-6 wires that connect directly to your monitor chassis via a Molex connector (or connectors as sometimes there are more than one). These wires control the video output coming from the board to the monitor.
In order to get the monitor out safely, we must disconnect these wires from the monitor chassis. Make sure that you note or create a diagram of which wires go to which pins on the chassis as it will come in handy later once we have installed the other monitor. Once you have made that notation, you can remove these wires which should free your monitor from all cabinet wiring.
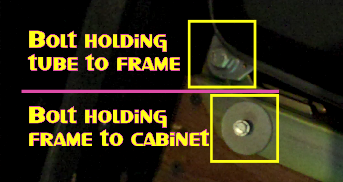
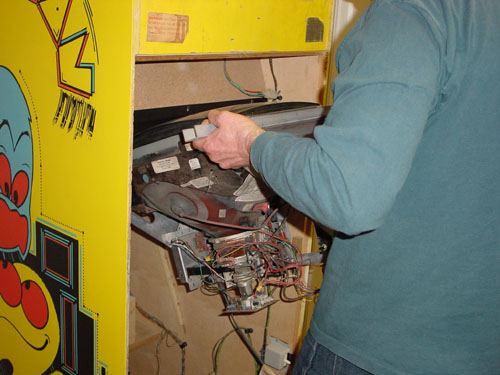
Now that all the cabinet wiring is disconnected, we can now safely remove our monitor from our arcade cabinet. Most monitors come out of the front of the arcade cabinet so you will probably need to unlatch your control panel and remove your bezel as well as any other obstructions that might block the monitor from coming out. Once we have removed these items, you should notice some sets of screws or bolts at the corners of the tube. One set holds the tube to the frame and the other set holds the frame to the cabinet. Most of the time we will want to remove the screws or bolts that are holding the frame to the cabinet so that we can remove the entire monitor and not just the tube. Please see the image below for more information.
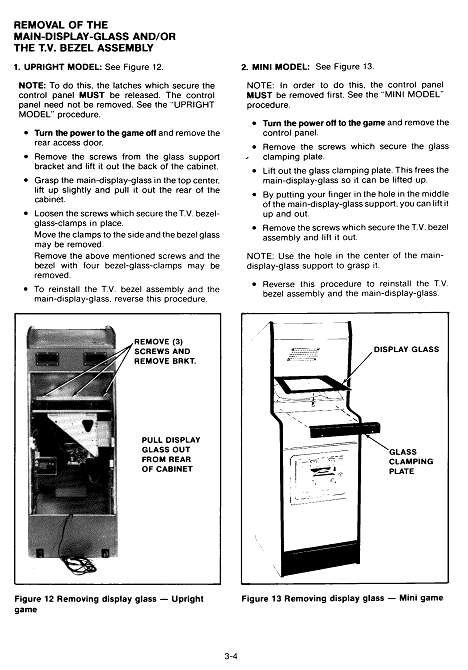
Once we have removed the bolts or screws that are holding the frame to the arcade cabinet, we can proceed with removing the monitor.

Once you have both established a firm grip, lift the monitor up and out of the cabinet. We recommend setting the monitor down on the part of the frame that supports the monitor chassis. If you plan on laying the monitor on the face of the tube, make sure that you have something soft to lay it on such as a blanket or a piece of cardboard to prevent scratches.
Before we begin the process of installing our other monitor, we recommend doing a couple of checks just to make sure that the monitor we are installing is going to work in our cabinet. The first thing you want to check is to see if the frame of the monitor your installing is similar to the monitor you just removed. If they are not the same, you might have to transfer the chassis and tube from the frame of the monitor you are installing to the frame of your old monitor. This is not a difficult process but it can be somewhat tedious. The second thing you want to check is that the monitors are roughly the same size.
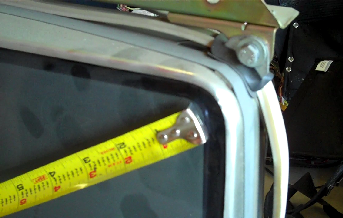
Take the length and width measurements of the monitor frame you are going to install to see if they are comparable to the monitor you are replacing. While you are taking these measurements, you might also check the viewable size of your monitor by measuring diagonally across your monitor from the inside black line. Please see the image below for more information.
Now that we’ve determined that our monitor is compatible with our cabinet, we can begin the process of installing it. We’re going to use the same process as we did when we removed the old monitor from the cabinet except in reverse. Start off with one person holding each side of the monitor. Gently lift up and place the bottom of the monitor into the cabinet. One person rotates from the side to the top of the monitor while the other person runs around to the back of the cabinet. Once the back person is in position, the front person can lean the top of the monitor into the cabinet with the back person making sure that the monitor is positioned correctly and free from obstructions. When the monitor is in place, we can then screw or bolt the frame to the cabinet to keep it from shifting when we’re moving it. At this point we should have the monitor secured to the cabinet and are now ready to wire it to our harness.
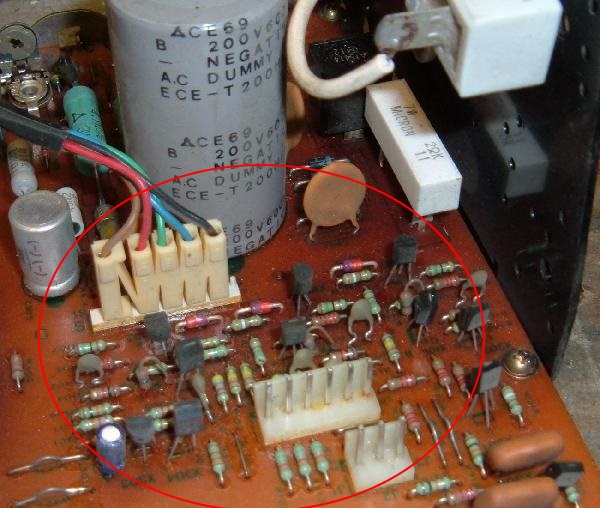
In a perfect world, all of the power and video connectors that every arcade game uses would be the same and we wouldn’t have to do any conversion to get it to work. Unfortunately this is not always the case. In order to get your newly installed monitor to work in your cabinet, you need to determine what kind of connectors it uses for video and power and see if they are the same as the connectors in your cabinet. If they are not the same, you might need to do some rewiring or repinning to get them to work. If you have the video connector for the new monitor, you can always tie the wires from your cabinet harness to this connector wiring provided that you can figure out which wire goes where. Make sure you refer to the diagram that you made for the connectors on your old monitor to give you a better idea. Of course, power is a little simpler as it is only 2-3 wires which can be easily identified using a multimeter. You can also use wire nuts on these wires if you are not experienced with or do not have any Molex connectors.
If you are having trouble figuring out the wiring for your newly installed monitor, here are some tips that might help you out. You might find that the newly installed monitor has a place for two sync wires but you only have one coming from your harness or vice versa. You might have to split or combine these sync wires depending on the requirements of the monitor. This can be accomplished quite simply by stripping the wire a couple of inches above the end and either tying or combining another wire into it at this point depending on the circumstance. If you’re having trouble figuring out which video wires are performing what functions, see if you can get a copy of the manual. The manual should contain the pinouts which you can then follow from the harness to determine the function of each wire.
Once we have finished wiring up the power and the video, we are now ready to try out our monitor. When we turn on the monitor for the first time, we might notice that the screen is not quite right. A lot of times you will need to adjust the monitor in order to get the desired picture. If you are still having trouble getting the picture the way you want it, you might check your wiring to make sure everything is correct. It could be that you have incorrectly hooked up your sync wires. Below are some pictures of what an out of sync screen looks like compared to a screen that just needs some hold adjustment to give you an idea of the difference. Hopefully after some minor wiring and potentiometer adjustments you can get the picture to the way that you like it.

Return Home
Looking for hard to find Pac/Ms Pac parts for your game? Click here for our Parts for Repair Page
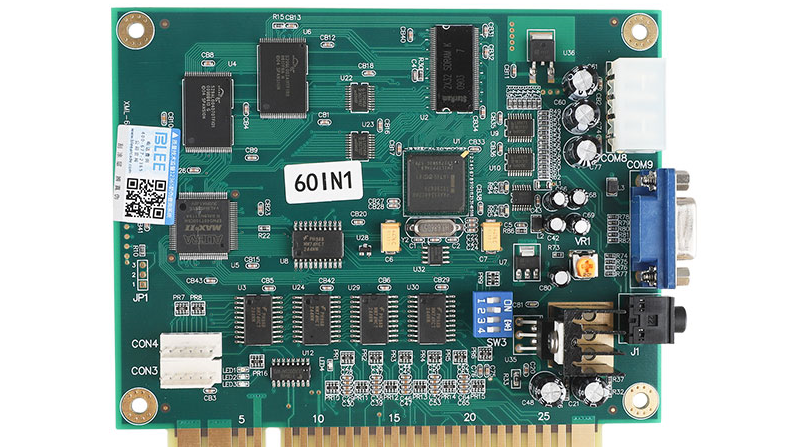
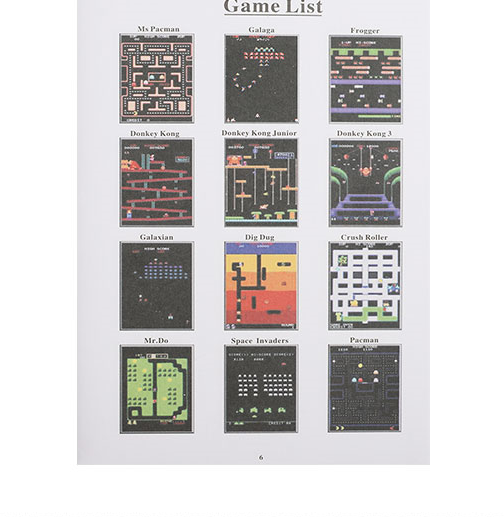
Just in case you’re into a simple fix and you feel you lack the expertise to fix your game. There is a cheap fix now for all your non working Pac-man monitors or a Pac PCB. Now you can replace the heavy, maintenance prone CRT arcade monitor with a light simple to use 19″ computer monitor! Also you can replace a non working Pacman or Ms Pacman PCB board with the inexpensive 60 in 1 multigame board and not only does it run Pacman and Ms Pac, but also Galaga, Donkey Kong, Centipede, Frogger, Scramble, Pacman plus and many more of the old 80’s classics. The JAMMA 60 in 1 Board plugs into a computer monitor cable port and works perfectly as a replacement PC VGA monitor for your broken Pacman monitor…Watch Below:
What you will need to upgrade your cabinet to a Multicade 60 in 1:
JAMMA Harness, joystick, buttons, Power supply Kit
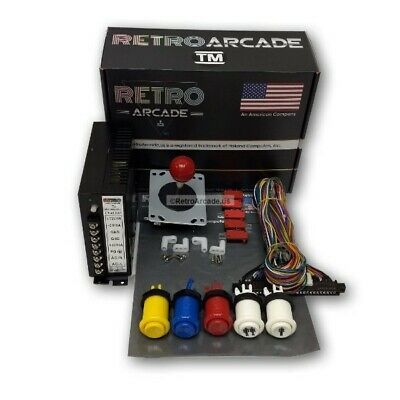
Joystick Panel with 3″ trackball

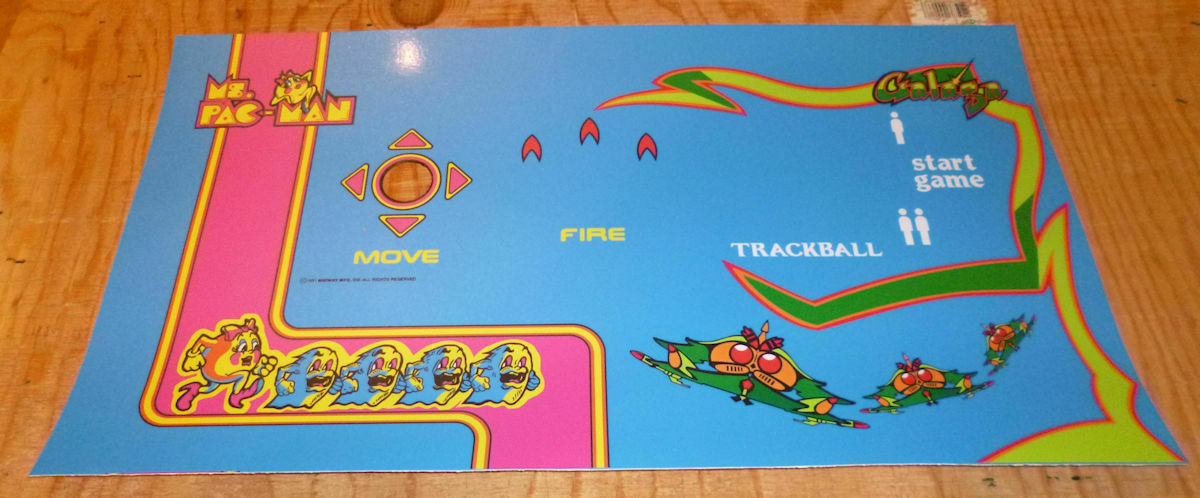
Game Will also play in cocktail mode and you can choose the games you wish to have displayed to play. This kit can go in any arcade cabinet and can be used with a replacement 19″ VGA PC monitor or larger monitor if your game cabinet can hold it. To watch how to install it here:
Hi,
I purchased a full stand up quarter arcade Ms Pac Man about 3 months ago. From your description, it appears to be an all original game from 1981 with the old style power supply, CRT and PCB.
It works great until today. It was turned off last night and when I powered it up it showed very little signs of life. The marquee came on. The screen was dark and there was no other response except a soft tone beeping that began about 2 minutes after power. The beeping lasted about 5 seconds and repeated about every 20 seconds.
The screen did show a flash or two and a small white graphic on the lower part of the screen for a couple of minutes. No other sounds or activity.
Nothing seems loose. I checked the more obvious connectors and soldered joints.
Any help? Thanks!
Ok first let’s rule some things out. You say it was working just a week ago or when you last had it on, then you turned it on in the morn and nothing? Sounds to me like a fuse blew or the power or partial power is not getting to the board. If the monitor is warming up..in other words you can hear the crackle of it coming on then it should be ok, just nothing getting to it from the board in order to show on screen. The marquee coming on means that the game is getting 110v power. Unplug the game then check the fuses on the bottom of the cabinet floor and also the interlock switch which is located on the back door of the game (Make sure it is pulled out or if the door is back on it needs to be depressed all the way in. Then make sure all the boards are in there socket including the mother board daughter card or aux cable if there… if you still can see nothing wrong..please take a pic of the inside of the game from the back open door and email them to me stuttle1970@att.net. Zooming in on all the boards and the power supply so that I can zoom in on each of them so I can see…. Thanks
Thank you very much for the information. I will try what you recommend and let you know. I really appreciate your time.
What are your thoughts about using a LCD with a CGA/VGA adapter (like the Arcade Game RGB CGA EGA YUV to VGA HD Video Converter Board HD9800 GBS8200) in place of a traditional Pac-Man monitor? I realize that there will be some change in the appearance compared to an actual direct connection, but would it work? I’m planning on picking up a PCB and using a switching power supply & JAMMA harness for the rest of the system, and if I can avoid having to use the original CRT, I would prefer it (unless the quality would be so poor that it would make it unreasonable). Your advice appreciated!
Great read! Thank you for sharing. Any tips on a screen that is off centered?
I’m sure that uve tried the adjustment knobs on the monitor right..if yes and the picture still won’t center….id try a new cap kit
Ok. Thanks. Reason for asking is I am contemplating buying one but the screen is off centered sometimes. Sounds like an easy fix though from what I’m getting. Parts aren’t too hard to find or too expensivse.
I have a Ms. Pac-Man machine everything works when you turn it on but after about 5 minutes the screen slowly fades away.
You have a capacitor problem…u must put on a new cap kit…u can find how to do that on the capt kit page on this site..or order a new chassis to match the monitor in ur game
After I get passed the apple I can’t see the dots on the screen
We have a MS PACMAN/GALAGA CLASS OF 1981 standup machine and the picture started to distort horizontally and even with adjustment kept getting worse and worse. Everyone I have talked to locally says we need to replace the monitor with a new LCD monitor. Any thoughts?
Find out what type monitor ur using now that’s distorted..then u can buy either a cap kit and replace all caps which should fix it…(goto the cap kit page for step by step instructions)..or u can simply buy the replacement chassis for ur brand of monitor..this will replace everything but the tube of ur monitor
My Ms. Pac Man standup arcade from 1981 has an issue with the display. The game play works but the right side of the screen waves/blurs in and out about 2-3 inches into the screen while the left side and center look fine. I’m not sure if this is a control issue or a monitor issue. The speed of all the characters is also very fast. I assume these are separate issues. Any ideas of where to start? Thanks!
Sounds like maybe a monitor issue..specificly needs a cap kit..but it maybe in the pcb board if the game is sped up..ither than the 6f speed up chip.. please can u take a pic of the screen and email it to me so that i may see it…stuttle1970@att.net
Recently, our game began making an electronic sparking noise in the monitor would flicker off for a second then come back on. It happens every one or two minutes. New monitor?
Sounds like the flyback is going bad. If it is sparking best time to buy a new chassis or new monitor. New chassis is a lot cheaper
I have a Ms Pacman that worked perfectly for years and then a year ago it stopped displaying any picture. I’m just getting around to fixing it now. You can still play the game blind. Do you think it is an issue with the monitor?
yes if u can hear the game playing as if it were ok except you don’t see any picture then ur monitor has either blown a fuse….has become unplugged…or the fly back in the monitor has become bad and has blown a fuse on the chassis of the monitor….the only fix for this would be a new chassis …or a new monitor entirely…but with the game unplugged check all the fuses as shown on the monitor page of this site
Good afternoon. I have an original ms Pacman. The boot ok sometimes. When it does you can play the game midway into playing the screen starts to display some weird signs and numbers and no longer boots up. It was been 5 years since I have touched the machine. Since I just came across this site. I curious to see if it is the monitor or motherboard. Thanks for your Time.
Yes this is very simple…You just have a dirty contact or short somewhere in your eprom …so sometimes it touches and works then other times it doesn’t. Read the cleaning your proms section of my website. The other is with power off reconnect your wire harness to the board making sure its all connected properly. Also for further reference goto the whats on my screen page and see if the fix is listed there for what’s on your screen